Hello, it's been a while.
With minimal use of the term 'Total Failure' I will conclude the squire soloist project... for now (queue dramatic music)
OK first of all, the paint. My initial idea - please bear in mind i am far from a competent painter - was to have a blood red translucent coat over a black base. That did not work as intended, the result was this ghastly pink splotchy mess that when lacquered turned into this sickly Burgundy. You may be thinking, 'it's just a bad colour, not that bad.' if you where thinking that, oh how wrong you are. Due to the cold temperatures in which i decided to paint the finish was more or less diabolical - the lacquer might as well have been sand painted onto the body in a mixture of vomit and viscera.
all in all, Total Failure in the paint department.
Electronics... Partial failure, I'm not sure why it's not working as intended but it could be a combination of factors. parts work and some parts don't - it can be played - but not played well.
i lost heart to explain the failure in the electronics department, there are many factors and i don't feel like exposing nay more Sam fail for today.
However, all is not lost - i will re plan, focus and finish this guitar. With an inspired paint job and new electronics. I ill begin work in the spring and the warmer weather.
all the best for 2009
Sam
Showing posts with label project. Show all posts
Showing posts with label project. Show all posts
Wednesday, 7 January 2009


Thursday, 13 November 2008
Squire Soloist Project - Day 2
More neck work
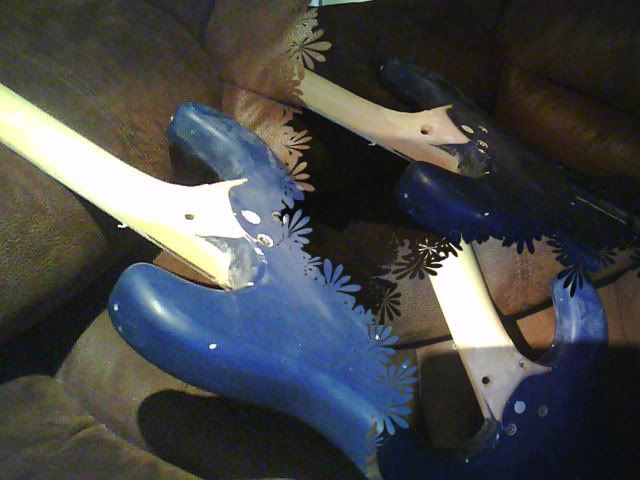
Looking good, I'm happy with how its going so far.
on the neck as you can see i have removed the plate on the back.
i bored the holes with a bore bit i found and hand drill, luckily i managed to found 4 screws to do the job - that neck is stronger than it was before.
Work left for day 2:
1) Re-fill holes an cover up screws with filler.
2) If time and if filler has set, sand to a smooth finish.
Tomorrow = Re-sand - clean - coat of primer - sand - fill unseen holes - sand - primer.
Looking good, I'm happy with how its going so far.
on the neck as you can see i have removed the plate on the back.
i bored the holes with a bore bit i found and hand drill, luckily i managed to found 4 screws to do the job - that neck is stronger than it was before.
Work left for day 2:
1) Re-fill holes an cover up screws with filler.
2) If time and if filler has set, sand to a smooth finish.
Tomorrow = Re-sand - clean - coat of primer - sand - fill unseen holes - sand - primer.
Squire Soloist Project - Day 1
My latest project is turning my roughed up, unusable squire stratocaster into a custom, functional - one of a kind guitar.
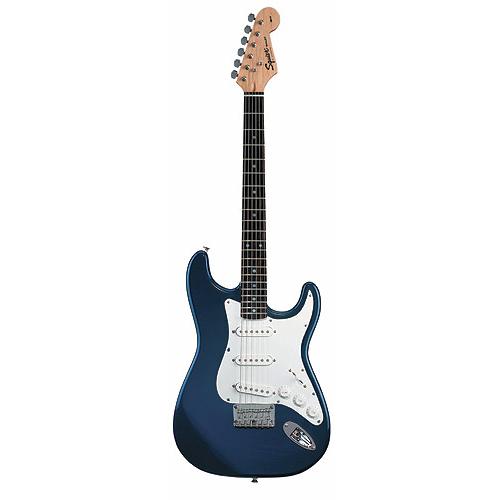
Here is what it looked like in pristine shop condition:
 Work done so far:
1) Removed parts (already partly done)
2) with chisel, worked neck joint and rounded it to an ergonomic shape (after a bit'o google work i don't think its been done before)
3) sanded whole guitar and took top gloss layer off (and wrecked my lunges breathing it in)
4) with wood filler, filled and sanded dents, dings, scratches etc. Then sanded flush with body.
5) masking taped neck to protect Rosewood fretboard to save it from paint.
sanded back of neck to sort out dings and dents from leaning it against desks and junk and remove lacquer coating.
6) applied Titebond III wood glue to joint then screwed it tight together.
7) cleaned up vast quantities of excess glue that came out the side of the joint upon compression.
8) ordered parts (£100 down :S)
9) waiting for glue to dry and took pictures.
tomorrow dependant on whether my acrylic primer arrives will give a coat of that.
Pictures of work done at end of day 1:
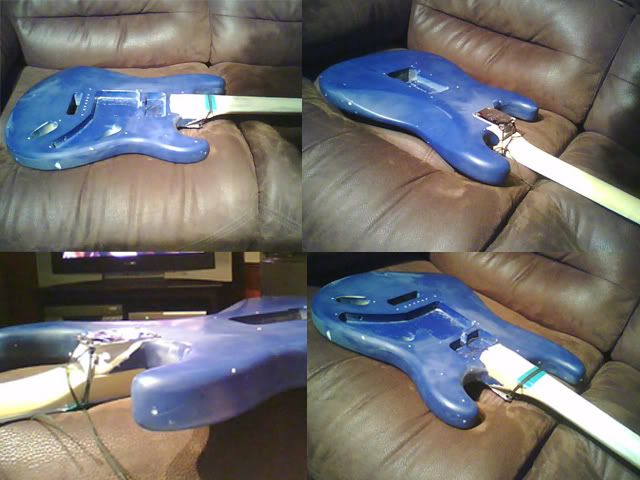
at the moment i am having to use the webcam on my acer 5920 so the pics are not great, but pretty good for a 0.3mp webcam.
Here is what it looked like in pristine shop condition:
Work done so far:1) Removed parts (already partly done)
2) with chisel, worked neck joint and rounded it to an ergonomic shape (after a bit'o google work i don't think its been done before)
3) sanded whole guitar and took top gloss layer off (and wrecked my lunges breathing it in)
4) with wood filler, filled and sanded dents, dings, scratches etc. Then sanded flush with body.
5) masking taped neck to protect Rosewood fretboard to save it from paint.
sanded back of neck to sort out dings and dents from leaning it against desks and junk and remove lacquer coating.
6) applied Titebond III wood glue to joint then screwed it tight together.
7) cleaned up vast quantities of excess glue that came out the side of the joint upon compression.
8) ordered parts (£100 down :S)
9) waiting for glue to dry and took pictures.
tomorrow dependant on whether my acrylic primer arrives will give a coat of that.
Pictures of work done at end of day 1:
at the moment i am having to use the webcam on my acer 5920 so the pics are not great, but pretty good for a 0.3mp webcam.
Subscribe to:
Posts (Atom)

 Posts
Posts

